Mickey Ears 3d Printer Template Free Download UPDATED
Mickey Ears 3d Printer Template Free Download
This post may incorporate affiliate links. If you purchase something through the link, I may receive a small commission at no actress accuse to yous.
Leap to Tutorial
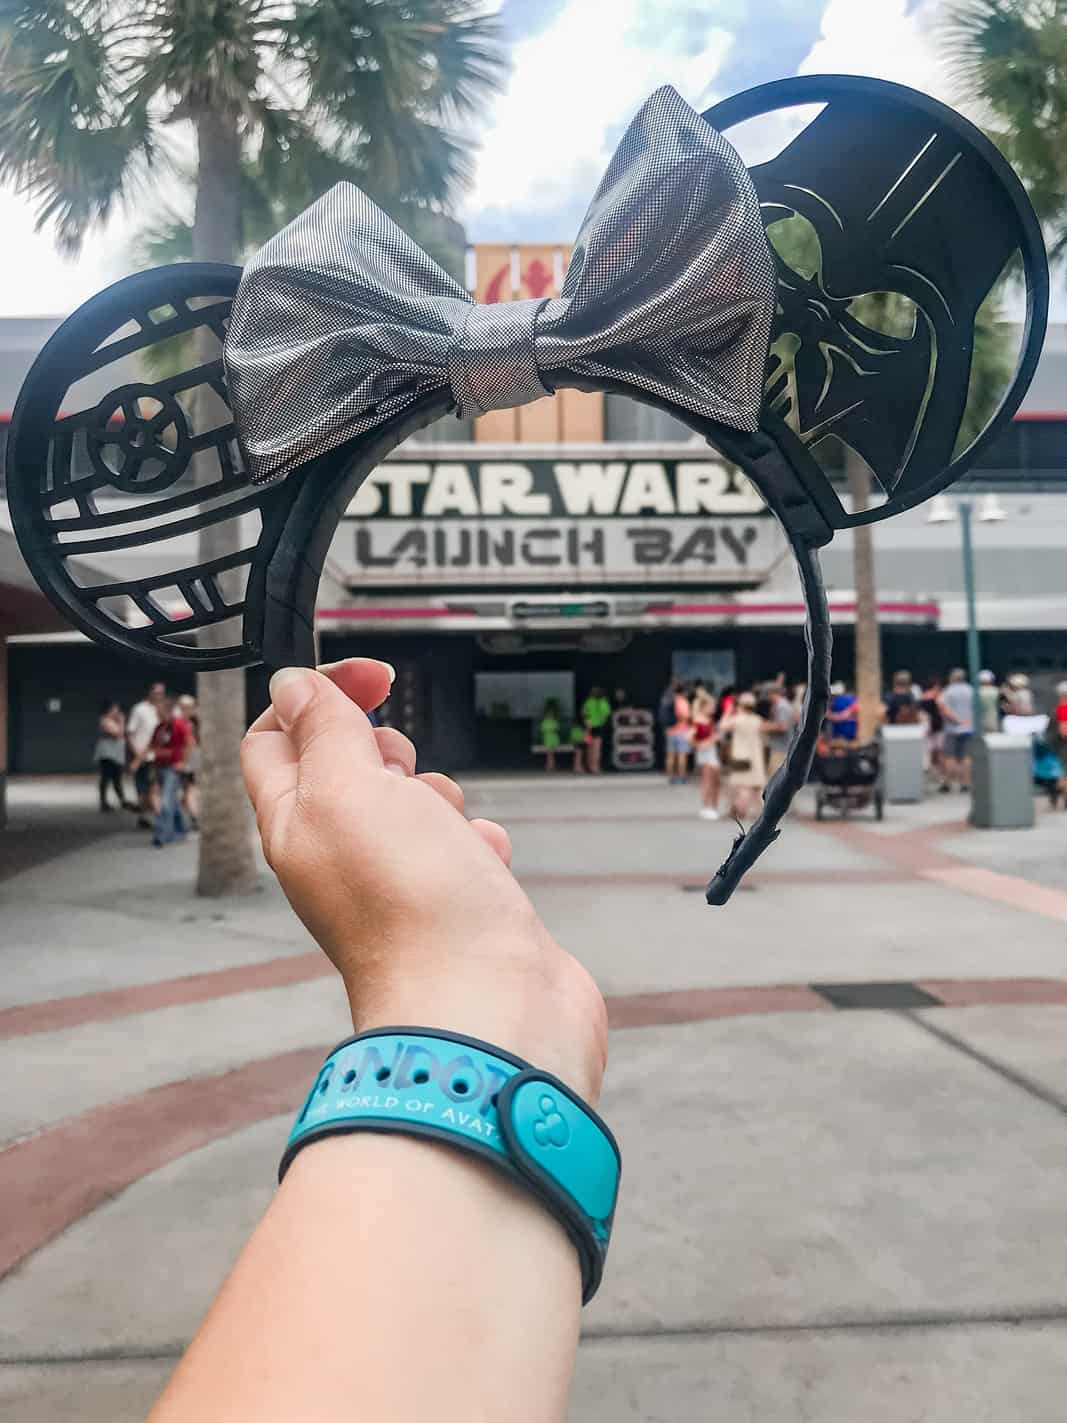
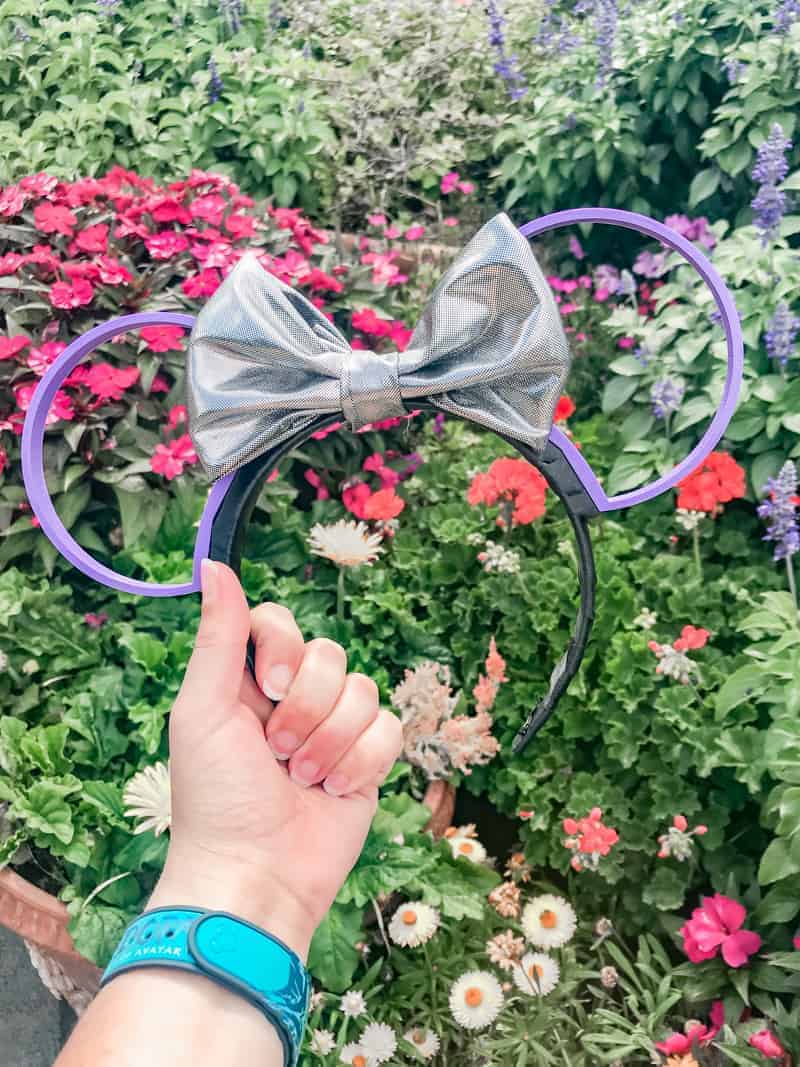
These 3D Printed Interchangeable Mickey Ears are fun to make with a 3D printer! They're lightweight, cute and you can make multiple pairs for all of your favorite characters!

To be able to make this project, you lot will need a 3D printer. Chris bought one a few years ago and we've been experimenting with different projects and designs ever since.
These 3D printed interchangeable Mickey ears were some of the offset things we tried to make and there was a lot of trial and error with them!
If yous don't take a 3D printer of your own, a lot of libraries have Maker Spaces where they take cutting machines (like a Silhouette Cameo or Cricut), 3D printers and more than. Cheque your local library to see what they offer and what you tin use!
If you are new to 3D printing there is a learning curve. Chris and I like to browse Thingiverse for ideas and examination prints, it's the best way to larn the software!
For these interchangeable Mickey ears Chris and I experimented with the size and design of them for a while until we got them correct. I let Chris do the designing and then compared the shape to the Mickey Ears Disney makes and sells until I felt like they were shut enough.
I too really wanted the ears to be interchangeable then nosotros figured out a way to use magnets in the ear design to make information technology happen. This is probably my favorite part of the entire design, just it isn't necessary if yous don't desire to change out your ear designs during the day!

Interchangeable Mickey Ears have three different parts, the
- headband,
- 3D printed magnetic confined, and
- 3D printed Mickey Ears.
If you exercise non desire to brand your ears interchangeable, you don't need to print out the bars and you'll just superglue your Ear designs direct to the headband. However, I retrieve they're easier to store and take upward less infinite if y'all can remove the ears.

Ordinarily asked questions when making 3D Printed Interchangeable Mickey Ears:
1. How exercise you discover the center of the headband?
I take a few other Mickey Ears that I used to assist me find the centre by laying my own headband on top of them so using a fabric pen to mark where the ears sat. This was super helpful and easy!
But if you don't have other headbands to go off of I suggest laying them on a fabric cut mat and finding the center that way (y'all can too use your Silhouette mat!). Lay your ears on top of the headband until yous find the desired wait, mark the spot with a material pen, and then super glue them on. Easy peasy!
ii. Does the headband slide effectually on your head if it'due south windy?
Short answer? Yeah .
Only if you lot use a certain type of fabric to wrap the headband with you lot can make it so that they don't. I suggest wrapping your headband with this textured trim then using imitation suede to put on the inside of the headband. The false suede will grip your hair and help the interchangeable Mickey Ears (mostly) stay put. That's non to say that a stiff gust of wind won't push them a little bit…but they shouldn't slide right off your caput unless the wind is crazy strong.
I used satin ribbon for my starting time headband. Don't do this. It is glace and I had to keep pushing the headband back in place because it would slide around!
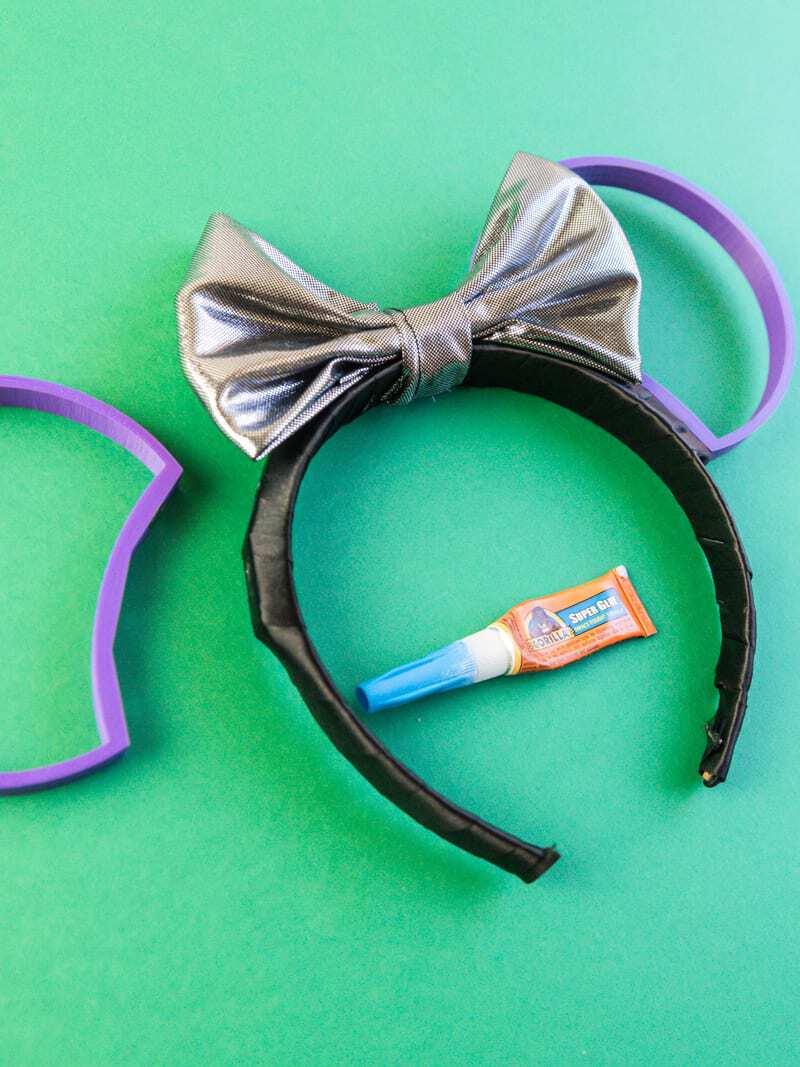
3. What type of glue do you employ to proceed the ears in identify?
Gorilla super glue is our favorite. Information technology doesn't take long to dry and information technology is STRONG.
Hot glue did non accept as good of a grip on the ears so I do non suggest using it. Stick with super glue.
four. Do you have a specific type of headband that you advise using for the headbands?
Honestly, any type of headband will work for this. I used these headbands from Amazon and I really liked them considering they were wide and did non squeeze/injure my head after a few hours of wearing them.
Y'all could also go to Sally's to endeavour to detect headbands that yous like. Target does not have them….trust me, I looked.
5. Where tin can I find designs to use for my Mickey Ears?
Chris and I similar to browse Thingiverse.com for Interchangeable Mickey Ears and other projects!
If you're new to 3D printing, using other people's designs for personal use only is a great way to get comfortable with the software and your printer. In one case you go more comfortable you tin can start experimenting with your own designs!
FAQ'South
Does this tutorial but work with interchangeable ears or tin you make a regular pair?
You do not need to make interchangeable ears if you don't want to! I dear them because they save space in my bag but it isn't necessary to make the ears removable.
You can still follow this tutorial, just leave out the small 3D printed magnetic bar and glue the ears directly onto the headband!
What if I don't have a 3D printer at home?
About library's accept a Maker Station now (ours is chosen Makerspace) that have all sorts of machines and equipment you can utilise!
Ours have:
- 3D printers,
- a Silhouette Cameo and Curio
- Heat Printing,
- Sewing machines and more than!
Make sure you check to see if yours is open though! Ours is currently letting y'all print things on a 3D printer by appointment only.
Silhouette Alta vs. Prusa 3D Printer
I accept never used the Silhouette Alta 3D printer so I cannot speak to the ease of press on information technology. I would say that the learning curve with the software is probably similar to using the software for the Prusa 3D printer we own.
However, Chris had to build his Prusa 3D printer himself and if parts break on it he has to troubleshoot it all on his own.
What I do like about the Prusa is that you lot can buy a office to print up to five different colors so you can accept a multi-colored design. Information technology'southward probably my favorite feature.
But, the Silhouette Alta comes out of the box ready to go so it is a great selection if you don't like a lot of prepare-up!
Instructions
- Identify magnets in magnetic bars and ears. Before you glue them in make sure that you take the magnets turned the right mode and then the ears and magnetic bars stick together.
- Use super glue to adhere the magnetic confined to your headband. (encounter post on how to detect the center of your headband to get the correct placement for your ears)
- Tightly wrap your headband with the elastic ribbon. Employ hot glue to adhere the ends of the ribbon to the headband.
- Cut a slice of the faux suede ribbon and super glue it to the within of your headband (this volition help it stay on your head).
- Brand a bow using this no-stitch tutorial.
- Attach information technology to your headband in betwixt the ears with super glue.
DOWNLOAD HERE
Posted by: wareheatted1945.blogspot.com

